Shit's breaking again so I'm resurrecting this blog!
Saturday I had a lovely hot shower, then rode my horse. I came home sweaty and smelling horsey, so I took another shower - but it was on the cold side of lukewarm. When I got out, I flipped the breaker off and back on then left it alone for the night.
Sunday, no hot water. I called a plumber and left a message to maybe get it fixed Monday, but my friends on Facebook heckled me into working on it myself.
Electric water heaters are actually pretty simple machines. There are two (copper) water pipes on top: cold water goes in, hot water comes out. There's a flex conduit line (silvery) for the wiring. Inside the water heater, one or two elements and thermostats make the water hot. I think two-element heaters are more common. Down at the bottom, there's a drain, and somewhere there's a little lever to release pressure. That's pretty much it.
Here's a fabulous video:
This is the main site I used. It helped me immensely.
I went and bought a digital multimeter for $25, then came home and tested stuff. I turned off the power at the breaker and checked it at the tank, like the video shows.
Here's my first problem: the multimeter I bought isn't labeled exactly like the one in the link. He says something like "set your multimeter on RX1 to test resistance" but mine doesn't say RH1 anywhere on it! Mine has the cryptic Greek symbols. So I had to look up what they mean - amultimeter.info was really helpful. Eventually I figured out that the horseshoe symbol measures resistance in Ohms, so I was ready to check the parts.
I checked both the heating elements, and they were good (normal is 11-14 Ohms, apparently, and mine were both at 11.) Then my main reference site said I could check the thermostats with the power off or on, so I went to flip the power back on. The breaker wouldn't stay flipped, which is always a Bad Sign.
I gave up in despair for the night. My friends on Facebook convinced me that drunk rednecks change out breakers all the time and rarely die and bombarded me with more helpful professional youtube videos.
This morning, I boiled two stock pots full of water to fill my little camping solar shower. I felt a lot better when I was clean, but the whole experience made me even more determined to fix the damn water heater already.
I took a picture of the breaker and headed back to my local hardware store. We all stared at it and compared it to the breakers on sale (there are several similar looking types) and picked out the one that looked right. I went home, read up on what I was doing one more time, and took the breaker box apart. Once I triple checked that the only power left in the box was the wires to the main breaker, I unscrewed the bad breaker, held my breath, and yanked it out of the box. It was narrower than the replacement.
Back to the hardware store, where I swapped the part out. Back home and I reassembled the breaker and turned the power back on. The water heater still wasn't hot, so I went back to the main site and tested the thermostats. The top one was fine, but the bottom one was bad (A 1 on my multimeter - I think that means infinite resistance.) I pulled it out and inspected it - it was kinda melty looking and one of the screws was charred.
Back to the hardware store. They were out of bottom thermostats, so I went 10 miles further to Home Depot and got a replacement thermostat and a new piece of wire. When I got back home, I wired the new thermostat in, reassembled everything, and turned the power back on and I was immediately rewarded with that water-getting-hot sound.
I rule!
Sunday, December 11, 2011
Wednesday, July 6, 2011
Mystery plant revealed
So the mystery plant in the garden reached immense size last week.
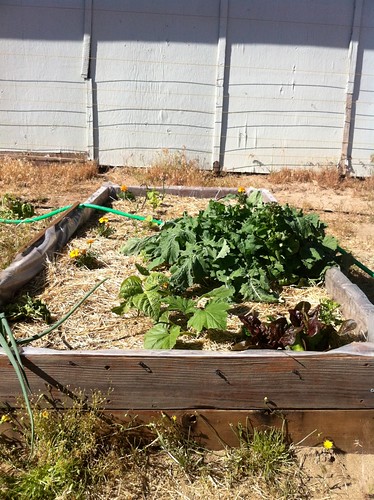
Right before I left for the weekend, I noticed that it had little broccoli-like florets on it. Ah-hah! I thought. I've grown a mutant broccoli plant.

When I came back it had bolted and the florets had bloomed.

I stared at it for a while and decided it had to go. It was shading out everything else in the garden, and I don't think broccoli leaves are good to eat, and it obviously hadn't formed proper heads. Maybe my homemade compost had mutating powers?
But when I pulled it I discovered it was a Turnip of Unusual Size.

Almost three pounds of turnip!

I have no idea if a bolted extremely large turnip is good to eat. I suppose I'll give it a shot - if it's awful, the chickens will probably nom it down.
Right before I left for the weekend, I noticed that it had little broccoli-like florets on it. Ah-hah! I thought. I've grown a mutant broccoli plant.
When I came back it had bolted and the florets had bloomed.
I stared at it for a while and decided it had to go. It was shading out everything else in the garden, and I don't think broccoli leaves are good to eat, and it obviously hadn't formed proper heads. Maybe my homemade compost had mutating powers?
But when I pulled it I discovered it was a Turnip of Unusual Size.
Almost three pounds of turnip!
I have no idea if a bolted extremely large turnip is good to eat. I suppose I'll give it a shot - if it's awful, the chickens will probably nom it down.
Thursday, June 30, 2011
Vinca
I planted some vinca in a weird little part-shade area beside the house. It's the east side, shaded in early morning by the property fence and in the afternoon by the house itself.
I ripped out all the weeds
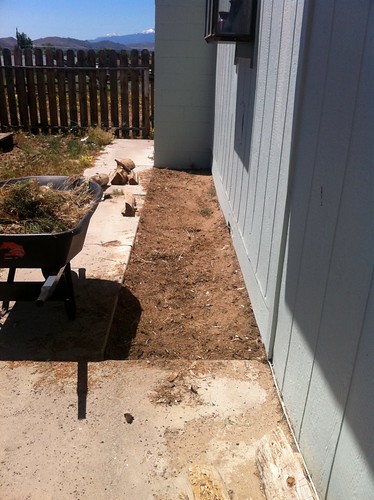
Dug out the sandy soil about 4" deep
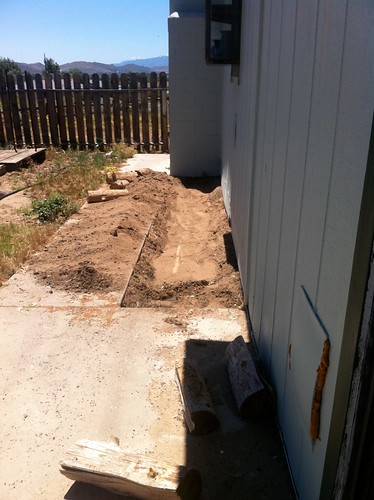
Amended it with my half-done compost and shoveled the sandy soil back on top
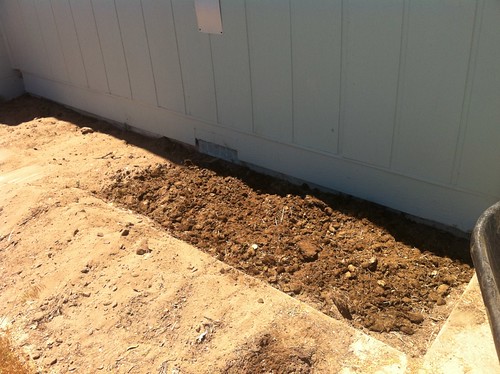
Laid a dripline and spaced the plants right on the drip holes

And mulched with waste hay.
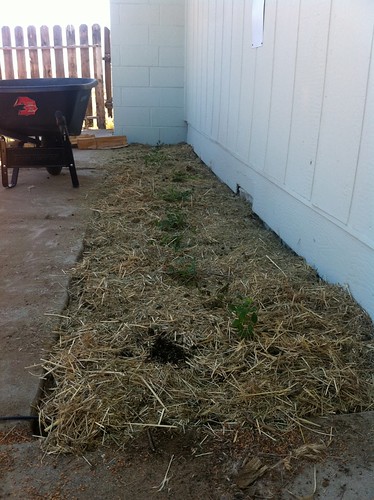
I think they'll be happy there. They don't grow very tall, but they spread nicely (at least the non-variegated ones do - that's why I bought more of them.) The dripline and the low plants means I won't be watering the side of the house and causing problems down the line. They never need mowing or pruning - all they want is shade and some water.
I ripped out all the weeds
Dug out the sandy soil about 4" deep
Amended it with my half-done compost and shoveled the sandy soil back on top
Laid a dripline and spaced the plants right on the drip holes
And mulched with waste hay.
I think they'll be happy there. They don't grow very tall, but they spread nicely (at least the non-variegated ones do - that's why I bought more of them.) The dripline and the low plants means I won't be watering the side of the house and causing problems down the line. They never need mowing or pruning - all they want is shade and some water.
Tuesday, June 21, 2011
Solstice planting, or, Home Depot wins again
Over the weekend, I'd talked to the G&AWS about gardening. I suspect it's ridiculously easy to grow stuff in the Bay Area. Maybe your tomatoes and peppers don't get enough sunny days to really mature. Boo hoo. AWS has a wee Meyer lemon tree! on her patio! Super jealous.
I haven't really planted much here because anything but the hardiest of plants needs water, and that means drip irrigation, and I haven't put one in because they're expensive or something. Also they require commitment - I would really have to figure out where I want to plant stuff and have a plan and follow through with it.
Oh well, it can't hurt to look, right? I went to Home Depot, just to see how expensive drip systems are. Turns out there's a decent starter kit for $20. No controller, of course, but all the lines and fittings you'd need for a couple of flower beds. In a daze, I put the starter kit in my cart and walked slowly over to the garden section.
I spent a full hour looking carefully at every. single. sun-loving. plant. Eventually, I bought a red climbing rose to go on the chain link fence, and a couple of little daylilies to hang out near it. And a lavender, because I've always wanted one, and a sage, because everything tastes better with sage. AND a half-flat of marigolds. AAAND a cucumber and a cantaloupe. (I still don't know what the Mystery Plant is, but this way I'm hedging my bets.)
My total bill was substantially more than $20.
Here's the rose fence. (Laura inspired me!) I figure I should give the poor thing a couple days to settle in before I unhook it from its poles and train it onto the fence.

Lavender and sage:
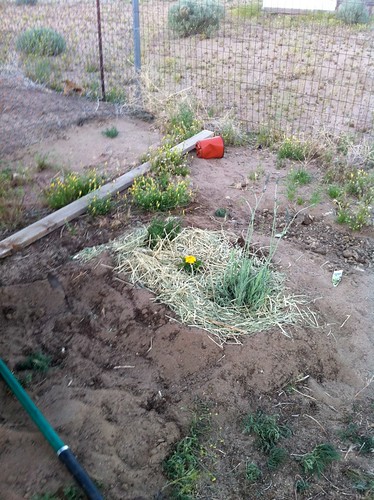
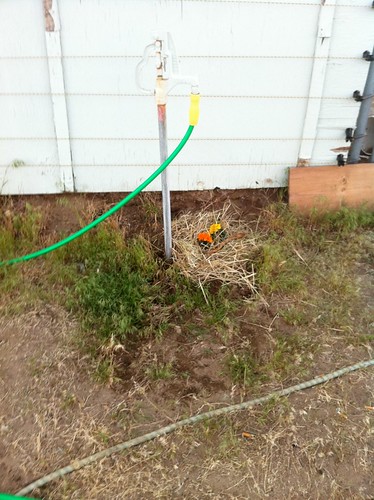
I uprooted the volunteer cheatgrass that thrives in the drip from the faucet and planted some marigolds there.
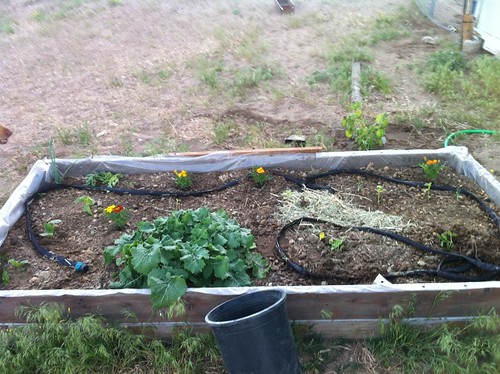
I put a bunch of marigolds in the halfhearted garden bed.
One of those damn banties escaped while I was gone and did some serious damage to my seedlings. I spent the morning reinforcing my chicken fence. (The other banty is setting on a huge clutch of eggs in the Dogloo!) Anyway, she's hopefully contained now!
Yes, I am mulching with sundried hay. Maybe it has weed seeds and I'll regret this, but I don't mind a little weeding. :)
Now, all I have to do is dig up the buried water line, put a new FF hydrant in, and install the drip irrigation. Oh, and find homes for the remaining 15 marigolds. Maybe I didn't really need a half-flat. :o
I haven't really planted much here because anything but the hardiest of plants needs water, and that means drip irrigation, and I haven't put one in because they're expensive or something. Also they require commitment - I would really have to figure out where I want to plant stuff and have a plan and follow through with it.
Oh well, it can't hurt to look, right? I went to Home Depot, just to see how expensive drip systems are. Turns out there's a decent starter kit for $20. No controller, of course, but all the lines and fittings you'd need for a couple of flower beds. In a daze, I put the starter kit in my cart and walked slowly over to the garden section.
I spent a full hour looking carefully at every. single. sun-loving. plant. Eventually, I bought a red climbing rose to go on the chain link fence, and a couple of little daylilies to hang out near it. And a lavender, because I've always wanted one, and a sage, because everything tastes better with sage. AND a half-flat of marigolds. AAAND a cucumber and a cantaloupe. (I still don't know what the Mystery Plant is, but this way I'm hedging my bets.)
My total bill was substantially more than $20.
Here's the rose fence. (Laura inspired me!) I figure I should give the poor thing a couple days to settle in before I unhook it from its poles and train it onto the fence.
Lavender and sage:
I uprooted the volunteer cheatgrass that thrives in the drip from the faucet and planted some marigolds there.
I put a bunch of marigolds in the halfhearted garden bed.
One of those damn banties escaped while I was gone and did some serious damage to my seedlings. I spent the morning reinforcing my chicken fence. (The other banty is setting on a huge clutch of eggs in the Dogloo!) Anyway, she's hopefully contained now!
Yes, I am mulching with sundried hay. Maybe it has weed seeds and I'll regret this, but I don't mind a little weeding. :)
Now, all I have to do is dig up the buried water line, put a new FF hydrant in, and install the drip irrigation. Oh, and find homes for the remaining 15 marigolds. Maybe I didn't really need a half-flat. :o
Sunday, June 12, 2011
Poodle defense established
You may remember the poodle story from last month. Well, today the damn poodle came BACK! I was sitting in the den drinking coffee (why does this little bastard only show up when I'm undercaffeinated?) with the patio doors open and clicketyclicketyclickety here it comes hauling ass across my yard. Thank god Banders was inside. I managed to keep Cersei in, slam the door in the poodle's face, and yell "GO HOME POODLE" at the top of my lungs til it got bored and left. Hopefully its stupid human heard me yelling, but she obviously has no real control over the dog.
Like, it's a poodle. It's not ravaging my livestock or even really inconveniencing me. It just sucks that I have to stay on guard - can you imagine how badly that scene could've gone if that stupid dog ran inside my house and set the crackninja off and then got in a fight with Cersei? And it totally wanted to come inside too! fffffffff
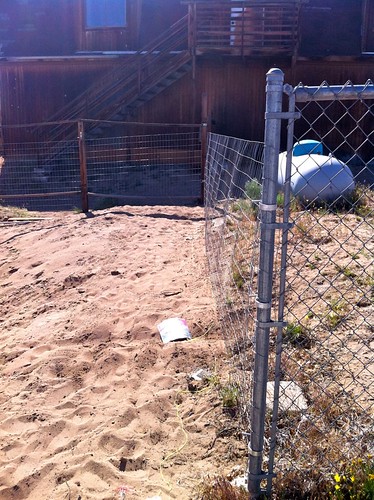
So I went to Home Depot and bought crap to put up a crappy fence. See, the old crappy fence blew down in the neverending spring blizzards, and I can't make a commitment to where I want to put up a new nice fence - or even what kind of fence I'd put up if I could just figure out where!
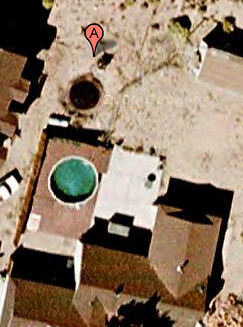
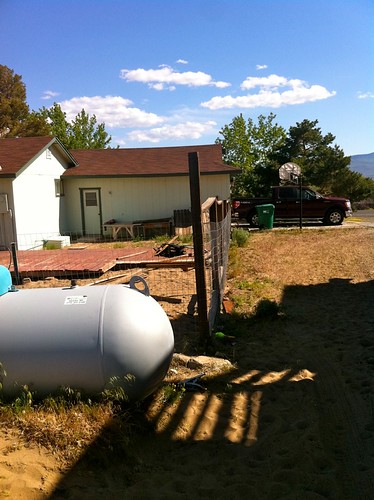
Here's the sat view of our poor backyard, at some point before we bought it. You can see the green pool, the white propane tank, the black .. thing? trampoline? The white square is the concrete patio - the hot tub is just peeking out of the shadow of the house.
Here it is today.
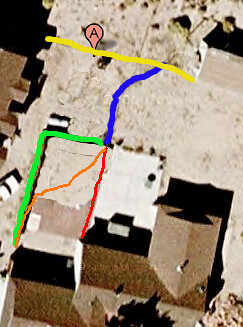
Yellow is the horse paddock hotwire. Blue is a perfectly nice run of chain link, with a nice double gate (not shown). I took out the pool (and black mystery object) so you can see how weird the remaining piece of deck looks and how it affects the yard and fenceline. The green line is the wooden privacy fence that blew down. Red and orange are my other options for fencing the backyard permanently.
The L-shaped green fenceline doesn't make much sense without the pool there. But I've still got some usable posts there, so that's where I ran the poodle fence.
I bought 100' of 4' welded wire, some chain link fence thingies, a come-along, and some bolts to make the fence stretcher thingie. I also got some t-posts to fill in the gaps, but honestly, I'm not sure if I'm going to use them. This isn't a permanent fence, it's not sagging, and I don't know if I am even going to bother with t-posts.
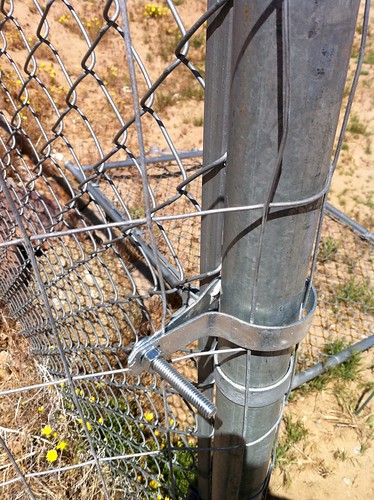
I used the chain link fence thingies to hook the welded wire on to the nice chain link fence post.
The only reliably sturdy object to hook the come-along to is, of course, my truck.
Here's the fence puller thingie. It's a scrap 2x4 cut in half, then clamped together, with holes drilled through both boards. While it was still clamped I made some random little reference marks - the sharpie lines.
That's so I can easily tell if I've got the boards both facing the right direction or not. Anyway, you put one board on each side of the end of the fencing. Bolt the boards together with your carriage bolts, and the pull from your come-along is more evenly distributed.
The fence looks damn fine for a first practical application of theoretical knowledge. I mean, I have seen dudes use come-alongs, and I understand the theory of fence-stretching, but I'd never really DONE this before.
The short leg of the L has no freakin line posts at all, and if I get off my lazy ass and pound t-posts tomorrow this is where I'll pound them. It's about 25'. That is pretty tight for welded wire!
The long side came out good too.
It all looks pretty awful, what with the jacked up old posts and the trash that needs picking up and the general weirdness of the deck and arrrgh. But at least I can drink coffee in peace, I hope.
For bonus poodle defense points, I shoveled dirt all along the bottom of the fence. I mean, the stupid thing can still dig in pretty easily, but if that damn poodle digs in to my fence, I'm just going to let Banders kill it.
Like, it's a poodle. It's not ravaging my livestock or even really inconveniencing me. It just sucks that I have to stay on guard - can you imagine how badly that scene could've gone if that stupid dog ran inside my house and set the crackninja off and then got in a fight with Cersei? And it totally wanted to come inside too! fffffffff
So I went to Home Depot and bought crap to put up a crappy fence. See, the old crappy fence blew down in the neverending spring blizzards, and I can't make a commitment to where I want to put up a new nice fence - or even what kind of fence I'd put up if I could just figure out where!
Here's the sat view of our poor backyard, at some point before we bought it. You can see the green pool, the white propane tank, the black .. thing? trampoline? The white square is the concrete patio - the hot tub is just peeking out of the shadow of the house.
Here it is today.
Yellow is the horse paddock hotwire. Blue is a perfectly nice run of chain link, with a nice double gate (not shown). I took out the pool (and black mystery object) so you can see how weird the remaining piece of deck looks and how it affects the yard and fenceline. The green line is the wooden privacy fence that blew down. Red and orange are my other options for fencing the backyard permanently.
The L-shaped green fenceline doesn't make much sense without the pool there. But I've still got some usable posts there, so that's where I ran the poodle fence.
I bought 100' of 4' welded wire, some chain link fence thingies, a come-along, and some bolts to make the fence stretcher thingie. I also got some t-posts to fill in the gaps, but honestly, I'm not sure if I'm going to use them. This isn't a permanent fence, it's not sagging, and I don't know if I am even going to bother with t-posts.
I used the chain link fence thingies to hook the welded wire on to the nice chain link fence post.
The only reliably sturdy object to hook the come-along to is, of course, my truck.
Here's the fence puller thingie. It's a scrap 2x4 cut in half, then clamped together, with holes drilled through both boards. While it was still clamped I made some random little reference marks - the sharpie lines.
That's so I can easily tell if I've got the boards both facing the right direction or not. Anyway, you put one board on each side of the end of the fencing. Bolt the boards together with your carriage bolts, and the pull from your come-along is more evenly distributed.
The fence looks damn fine for a first practical application of theoretical knowledge. I mean, I have seen dudes use come-alongs, and I understand the theory of fence-stretching, but I'd never really DONE this before.
The short leg of the L has no freakin line posts at all, and if I get off my lazy ass and pound t-posts tomorrow this is where I'll pound them. It's about 25'. That is pretty tight for welded wire!
The long side came out good too.
It all looks pretty awful, what with the jacked up old posts and the trash that needs picking up and the general weirdness of the deck and arrrgh. But at least I can drink coffee in peace, I hope.
For bonus poodle defense points, I shoveled dirt all along the bottom of the fence. I mean, the stupid thing can still dig in pretty easily, but if that damn poodle digs in to my fence, I'm just going to let Banders kill it.
Friday, June 10, 2011
Swamp cooler
I spent a couple days this week getting the swamp cooler working properly again. It hadn't worked correctly since we bought the house. It was totally jury rigged and it's a wonder it blew cool air at all, but now it's running pretty close to perfect.
I didn't know what a swamp cooler was til I moved out West. It's an evaporative cooler - a pump moves water from a reservoir to the top of the unit, where the water trickles down over some pads. A really powerful fan sucks air through the wet pads and blows it out into the room. Works astonishingly well in hot dry climates (and not at all in humid climates.)
The neat thing is that all the parts are remarkably standardized. I went to Home Depot and stocked up on everything (I thought) I'd need to replace and fix: water lines, pads, anti scaling stuff, and leak sealing paint stuff. Oh, and a Shop Vac. It would make the job easier - make LOTS of jobs easier. It was surprisingly easy to talk myself into a new tool :)
When I opened it up to look inside, Banders had to go investigate.

Blue float valve (broken), green pump (broken, didn't know it at the time), blue tube takes water from the pump up to the pads, white debris filter basket, random castors.

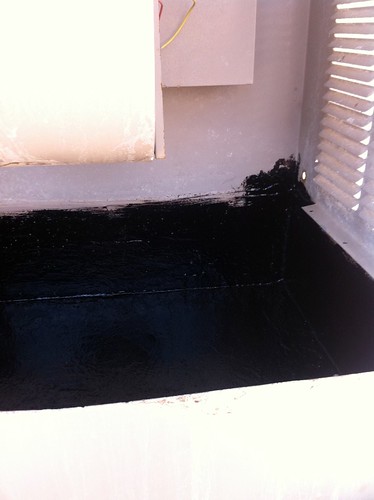
Scraped up the loose paint to reveal a lot of rust underneath. (The shop vac worked perfectly!)

Painted it with asphalt leak-stopper stuff and left it to dry overnight.
I replaced the gross aspen pads with some kind of blue fluffy synthetic stuff. Installed a new float valve and swapped the disgusting pump tube with a new one. On to the plumbing!
The previous owners plumbed the swamp cooler the normal way, with 1/4" tubing that ran under the house (from the nearest water line in the kitchen), out the vent nearest the cooler, and up to the cooler by that float valve. But for some reason, they didn't put in a way to drain the line, so the line froze and broke. They crawled bravely under the house and turned off the water at the kitchen end of things, then the summer after that they hooked up a garden hose. But the hose led to a frost-free hydrant, not a twist-knob spigot - so the water is either on or off, so it's either overflowing the swamp cooler or running dry. Classy!
Here's the heart of what I did:
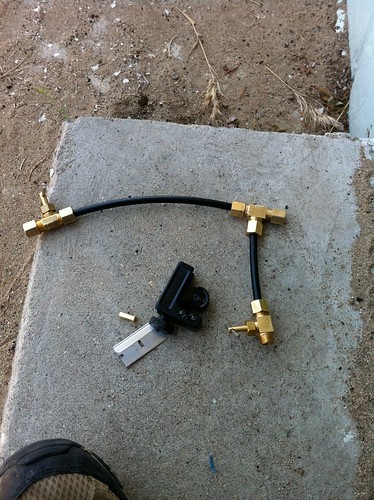
I wanted to be able to turn the water off for winter and drain the exterior section of the line without crawling a terrifying quarter mile* under the house. I got as much of the work done outside as I could. The existing copper water line comes in on the left. There's a valve there to turn the water off for winter. It flows through to the T junction. The valve below the T is the drain valve - in the fall, I will turn off the water at the valve on the right, then open the lower valve and the line should clear. The new plastic line goes from the right side of the T to the outside world and up to the swamp cooler.
I used the pipe cutter to score the water lines, then used the razor blade to cut them cleanly. Ended up with super nice straight sharp cuts that way.
Anyway, there wasn't much else to do except go under the house. The den, where the swamp cooler lives, is an addition to the house. The ground under it isn't excavated as far so it's more belly crawling and less hands and knees crawling. It has many, many spiderwebs. But! The water line is only like 10' from the crawlspace entrance! I took a stick in one hand (to bash spiderwebs) and all of my tools in the other and crawled down there and did my work. Not so bad.
Next I had to go turn on the water where the copper line hooked in to the main plumbing. I took my trusty stick and went down the other crawlspace entrance, to the original house, and got pretty lost. I know, it's like a 1500 sq ft house, how can you get lost? All I can say is that it's pretty confusing, trying to figure out what room you're crawling around under. Eventually I crawled a complete circle under there and ended up at the kitchen. Where the water pipes would've led me, had I paid attention to them. And, since I was looking up trying to find my 1/4" copper line, I saw the FUCKALL BIG SPIDER when it MOVED.
I bout had a heart attack, yall. I know it is a totally irrational fear. Spiders are not out to get us (well, most of the time) and their bites are so rarely serious or fatal that it's a black swan event. But that's not what I'm scared of! I'm scared of dying of the heebie jeebies if I touch one! Slightly more seriously, I'm scared of giving myself a concussion by trying to leap to my feet to run away while still under the house.
So I saw this Shelob-sized** spider and had to stop for a while and breathe deeply and, I admit it, whimper. And cry. I cried down there. I cried even more when I realized the fell beast was chilling out about 2' from the very valve I needed to turn.
I quit for the day. Yeah, the waterproofing asphalt stuff needed to dry, but honestly, I couldn't face that spider. I whined on Facebook about the giant spider, and I must say, y'all were less than sympathetic.
The next day, I took a picture to prove how big Shelob was. I crawled back out from under the house to post it.

Giant shiny black spider. Living in the dry darkness under a house. Strong, sticky, irregular webs everywhere under the house. Hey, great, she's probably a black widow!
I seriously succumbed to the heebie jeebies at that point. I took off my gloves and long sleeved shirt and flailed around whacking imaginary creepy crawlies all over my body. I gradually convinced myself that they're not aggressive and that wasp spray would let me kill Shelob from a distance, and I sternly did not think about the OTHER black widows probably living down there. Plus, I decided, if I did get bitten and had to go to the doctor they might give me Xanax for the shivering gibbering horror nightmares. See? That's looking on the bright side.
After that, it was fairly anticlimatic. I crawled very slowly back under the house. I did not look around for other spiders. I sprayed the big one, crawled over, bashed her with my stick to put her out of her misery, and turned on the water.
While the reservoir filled up, I tried the pump. No luck - even when I tried it in a pan of water in the sink. $25 at the hardware store got me a new replacement pump. Yes, I tested it in the pan of water in the sink, and yes, it immediately sprayed a jet of water down the countertop, and yes, I felt pretty dumb. But it also worked perfectly when I plugged it in in the swamp cooler.
Here's the new setup (with the old cooler - but the new one is identical).
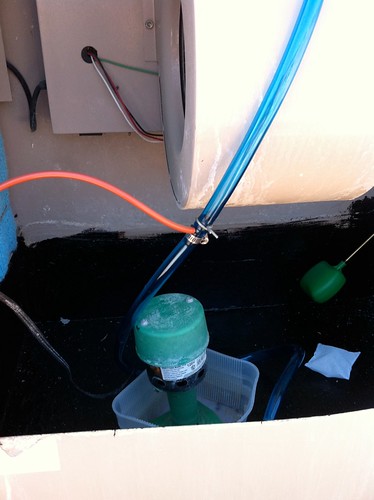
The tan line coming out of the blue line is a bleed-off line. We have hard well water, and the swamp cooler was pretty crusted up with minerals. I think that's what killed the old pump, actually. The idea is that as the water evaporates, it leaves minerals behind, so the total water in the swamp cooler becomes more and more mineralized. The bleed-off valve will dump some of the heavily mineralized water outside, and new fresh water will come in to replace it. The problem is that the bleed-off valve dumps water faster than the intake line delivers it, so I'll just need to manually bleed the system every so often. I can just open the cooler, hang the bleed line outside the cooler, and let it dump some of the water.
Anyway, that is my story of bravery and cleverness. I will let you know if I actually got bitten and haven't noticed. (Jane - I have a migraine today, which is uncommon but not unheard of, and I'm totally convinced I did get bit.)
Next up - I swapped out an ugly ceiling fan and an ugly light fixture for more attractive ones. I could write about that?
*possibly a slight exaggeration.
**I had that 1978 Brothers Hildebrandt LOTR calendar! Anybody else remember it?
I didn't know what a swamp cooler was til I moved out West. It's an evaporative cooler - a pump moves water from a reservoir to the top of the unit, where the water trickles down over some pads. A really powerful fan sucks air through the wet pads and blows it out into the room. Works astonishingly well in hot dry climates (and not at all in humid climates.)
The neat thing is that all the parts are remarkably standardized. I went to Home Depot and stocked up on everything (I thought) I'd need to replace and fix: water lines, pads, anti scaling stuff, and leak sealing paint stuff. Oh, and a Shop Vac. It would make the job easier - make LOTS of jobs easier. It was surprisingly easy to talk myself into a new tool :)
When I opened it up to look inside, Banders had to go investigate.
Blue float valve (broken), green pump (broken, didn't know it at the time), blue tube takes water from the pump up to the pads, white debris filter basket, random castors.
Scraped up the loose paint to reveal a lot of rust underneath. (The shop vac worked perfectly!)
Painted it with asphalt leak-stopper stuff and left it to dry overnight.
I replaced the gross aspen pads with some kind of blue fluffy synthetic stuff. Installed a new float valve and swapped the disgusting pump tube with a new one. On to the plumbing!
The previous owners plumbed the swamp cooler the normal way, with 1/4" tubing that ran under the house (from the nearest water line in the kitchen), out the vent nearest the cooler, and up to the cooler by that float valve. But for some reason, they didn't put in a way to drain the line, so the line froze and broke. They crawled bravely under the house and turned off the water at the kitchen end of things, then the summer after that they hooked up a garden hose. But the hose led to a frost-free hydrant, not a twist-knob spigot - so the water is either on or off, so it's either overflowing the swamp cooler or running dry. Classy!
Here's the heart of what I did:
I wanted to be able to turn the water off for winter and drain the exterior section of the line without crawling a terrifying quarter mile* under the house. I got as much of the work done outside as I could. The existing copper water line comes in on the left. There's a valve there to turn the water off for winter. It flows through to the T junction. The valve below the T is the drain valve - in the fall, I will turn off the water at the valve on the right, then open the lower valve and the line should clear. The new plastic line goes from the right side of the T to the outside world and up to the swamp cooler.
I used the pipe cutter to score the water lines, then used the razor blade to cut them cleanly. Ended up with super nice straight sharp cuts that way.
Anyway, there wasn't much else to do except go under the house. The den, where the swamp cooler lives, is an addition to the house. The ground under it isn't excavated as far so it's more belly crawling and less hands and knees crawling. It has many, many spiderwebs. But! The water line is only like 10' from the crawlspace entrance! I took a stick in one hand (to bash spiderwebs) and all of my tools in the other and crawled down there and did my work. Not so bad.
Next I had to go turn on the water where the copper line hooked in to the main plumbing. I took my trusty stick and went down the other crawlspace entrance, to the original house, and got pretty lost. I know, it's like a 1500 sq ft house, how can you get lost? All I can say is that it's pretty confusing, trying to figure out what room you're crawling around under. Eventually I crawled a complete circle under there and ended up at the kitchen. Where the water pipes would've led me, had I paid attention to them. And, since I was looking up trying to find my 1/4" copper line, I saw the FUCKALL BIG SPIDER when it MOVED.
I bout had a heart attack, yall. I know it is a totally irrational fear. Spiders are not out to get us (well, most of the time) and their bites are so rarely serious or fatal that it's a black swan event. But that's not what I'm scared of! I'm scared of dying of the heebie jeebies if I touch one! Slightly more seriously, I'm scared of giving myself a concussion by trying to leap to my feet to run away while still under the house.
So I saw this Shelob-sized** spider and had to stop for a while and breathe deeply and, I admit it, whimper. And cry. I cried down there. I cried even more when I realized the fell beast was chilling out about 2' from the very valve I needed to turn.
I quit for the day. Yeah, the waterproofing asphalt stuff needed to dry, but honestly, I couldn't face that spider. I whined on Facebook about the giant spider, and I must say, y'all were less than sympathetic.
The next day, I took a picture to prove how big Shelob was. I crawled back out from under the house to post it.
Giant shiny black spider. Living in the dry darkness under a house. Strong, sticky, irregular webs everywhere under the house. Hey, great, she's probably a black widow!
I seriously succumbed to the heebie jeebies at that point. I took off my gloves and long sleeved shirt and flailed around whacking imaginary creepy crawlies all over my body. I gradually convinced myself that they're not aggressive and that wasp spray would let me kill Shelob from a distance, and I sternly did not think about the OTHER black widows probably living down there. Plus, I decided, if I did get bitten and had to go to the doctor they might give me Xanax for the shivering gibbering horror nightmares. See? That's looking on the bright side.
After that, it was fairly anticlimatic. I crawled very slowly back under the house. I did not look around for other spiders. I sprayed the big one, crawled over, bashed her with my stick to put her out of her misery, and turned on the water.
While the reservoir filled up, I tried the pump. No luck - even when I tried it in a pan of water in the sink. $25 at the hardware store got me a new replacement pump. Yes, I tested it in the pan of water in the sink, and yes, it immediately sprayed a jet of water down the countertop, and yes, I felt pretty dumb. But it also worked perfectly when I plugged it in in the swamp cooler.
Here's the new setup (with the old cooler - but the new one is identical).
The tan line coming out of the blue line is a bleed-off line. We have hard well water, and the swamp cooler was pretty crusted up with minerals. I think that's what killed the old pump, actually. The idea is that as the water evaporates, it leaves minerals behind, so the total water in the swamp cooler becomes more and more mineralized. The bleed-off valve will dump some of the heavily mineralized water outside, and new fresh water will come in to replace it. The problem is that the bleed-off valve dumps water faster than the intake line delivers it, so I'll just need to manually bleed the system every so often. I can just open the cooler, hang the bleed line outside the cooler, and let it dump some of the water.
Anyway, that is my story of bravery and cleverness. I will let you know if I actually got bitten and haven't noticed. (Jane - I have a migraine today, which is uncommon but not unheard of, and I'm totally convinced I did get bit.)
Next up - I swapped out an ugly ceiling fan and an ugly light fixture for more attractive ones. I could write about that?
*possibly a slight exaggeration.
**I had that 1978 Brothers Hildebrandt LOTR calendar! Anybody else remember it?
Monday, March 14, 2011
Spring fever
I gardened!
It's probably dumb, because we have yet another series of rain or snow storms coming in this week, but oh well - if I lose $2 worth of seeds, I'll live.
My friend M has a silver poplar in her front yard. It sends up tons of little suckers every year. She usually cuts them out and throws them away, but last fall I asked her to save them for me. Today seemed like a good day to plant them, so I went over and we dug them up and I took them home.
I'm putting them in the DMZ, the area between the perimeter fence and the horse-safe hotwire fence. It's about 10' wide so there's plenty of room for the little saplings to spread out. (The internet assures me that silver poplars aren't poisonous to horses.) They grow very fast, and they seem pretty hardy, so hopefully I'll have a decorative forest in not too many years.
I dug each little treeling a hole, filled the hole mostly full with compost, then shoved the tree in and covered it with soil. I hope the compost holds water a little better so these guys can go a little longer between waterings.
Once I had all of them in the ground, I lined my raised bed with plastic, then filled it with dirt. I alternated thin layers of compost and sand-dirt, then squatted down and really worked the layers together with my hands. I pulled out a bunch of non-compost crap (nails and sagebrush roots and bits of plastic) and a bunch of itty bitty grass shoots. Then I got really excited and planted some stuff - lettuce, spinach, radishes, broccoli, and turnips. I want to succession-plant the salad veggies anyway, so I did tiny plantings of them, and I planted a rather modest amount of broccoli and turnips. All told, I only used about 1/3 of the bed.
I don't appear to have any hand garden tools so I, uh, used a fork. A kitchen fork. It works quite well for making seed holes in fluffy prepared beds!
Then I stapled some black plastic over the whole shebang. It should keep my little seeds from freezing if it does freeze, keep the moisture in, and heat the soil if the sun ever comes back out. My earliest sprout date is 5 days from now, so I'll pull the plastic off of the bottom third later this week. Five days is Friday - but right now the low on Friday is forecast to be well below freezing. Saturday I'll be away at Rides of March, and there's no point in pulling the plastic when I get home Saturday night, so... maybe Sunday morning? I dunno what to do!
Subscribe to:
Posts (Atom)